Claude Desktop Integration
Connect TengineAI to Claude Desktop using the built-in MCP connector. Claude Desktop handles the full OAuth 2.1 flow automatically — you just provide your OAuth credentials and the server URL.
Once connected, Claude Desktop will have access to all tools you've registered and enabled in your TengineAI project.
How the Connection Works
TengineAI acts as an OAuth 2.1 authorization server. When you add TengineAI as a connector in Claude Desktop:
- Claude Desktop discovers TengineAI's OAuth configuration via
/.well-known/oauth-protected-resource - Claude Desktop initiates an authorization code flow with PKCE to
/api/v1/mcp-oauth/authorize - TengineAI validates your Client ID and Secret, then issues an authorization code
- Claude Desktop exchanges the code for an access token at
/api/v1/mcp-oauth/token - All subsequent MCP requests are authenticated with that token — transparently, in the background
You don't manage tokens manually. Claude Desktop handles the entire lifecycle including refresh.
Prerequisites
Before you begin:
- ✅ A TengineAI account and project
- ✅ An MCP integration created in your project (provides the OAuth Client ID and Secret)
- ✅ At least one tool registered and enabled in your project
- ✅ Claude Desktop installed (Pro or Team account)
Tools must be registered and enabled before connecting. Claude Desktop will connect successfully even with no tools, but the model won't have anything to call. Register tools first using the Custom Tools guide, then come back here.
Setup Guide
Step 1: Get Your OAuth Credentials
- Log into your TengineAI Dashboard
- Open your project → Integrations tab
- Create a new MCP integration, or open an existing one
- Copy your credentials:
- OAuth Client ID — your integration's client identifier
- OAuth Client Secret — shown once at creation; save it securely
- Server URL —
https://app.tengine.ai/mcp/
The Client Secret is shown only once. If you lose it, rotate it from the integration settings.
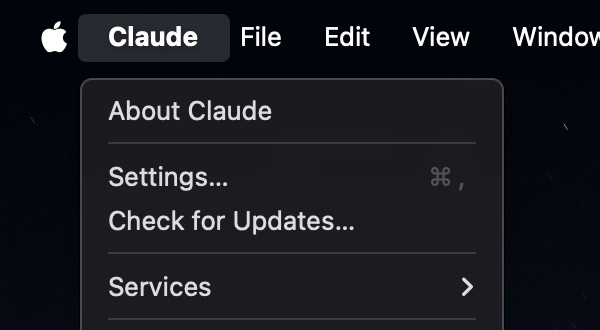
Step 2: Open Claude Desktop Settings
Click the Claude Settings icon in Claude Desktop.
Step 3: Access Connectors
In Claude Desktop Settings, click Settings in the left sidebar, then navigate to Connectors.
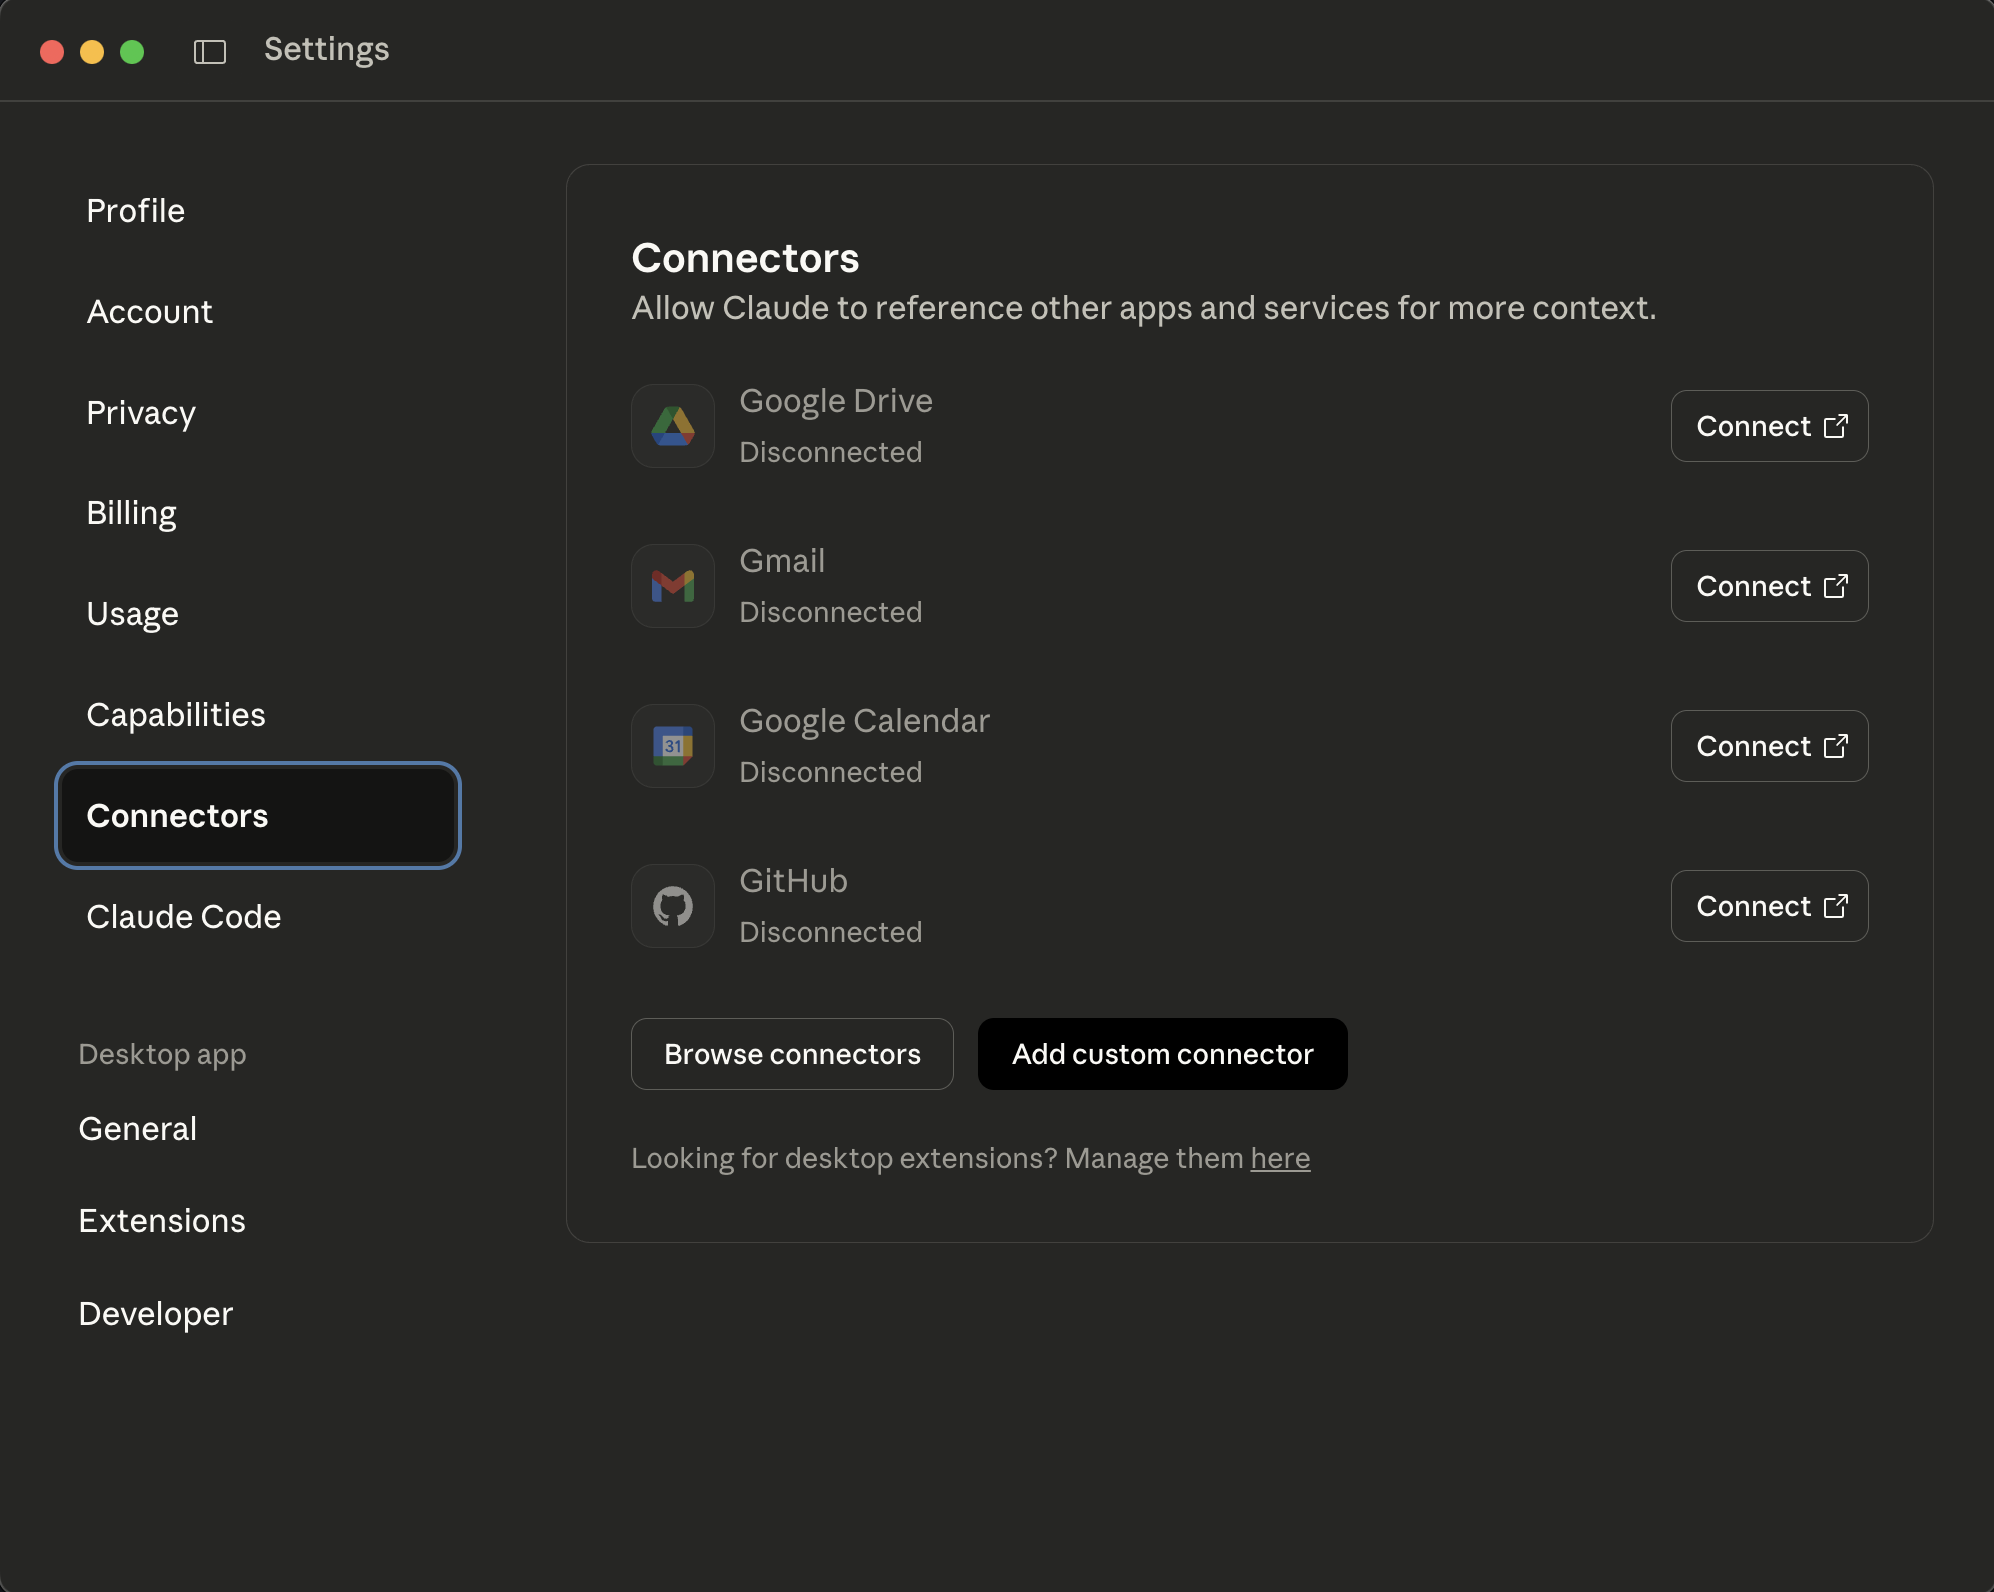
Step 4: Add the TengineAI Connector
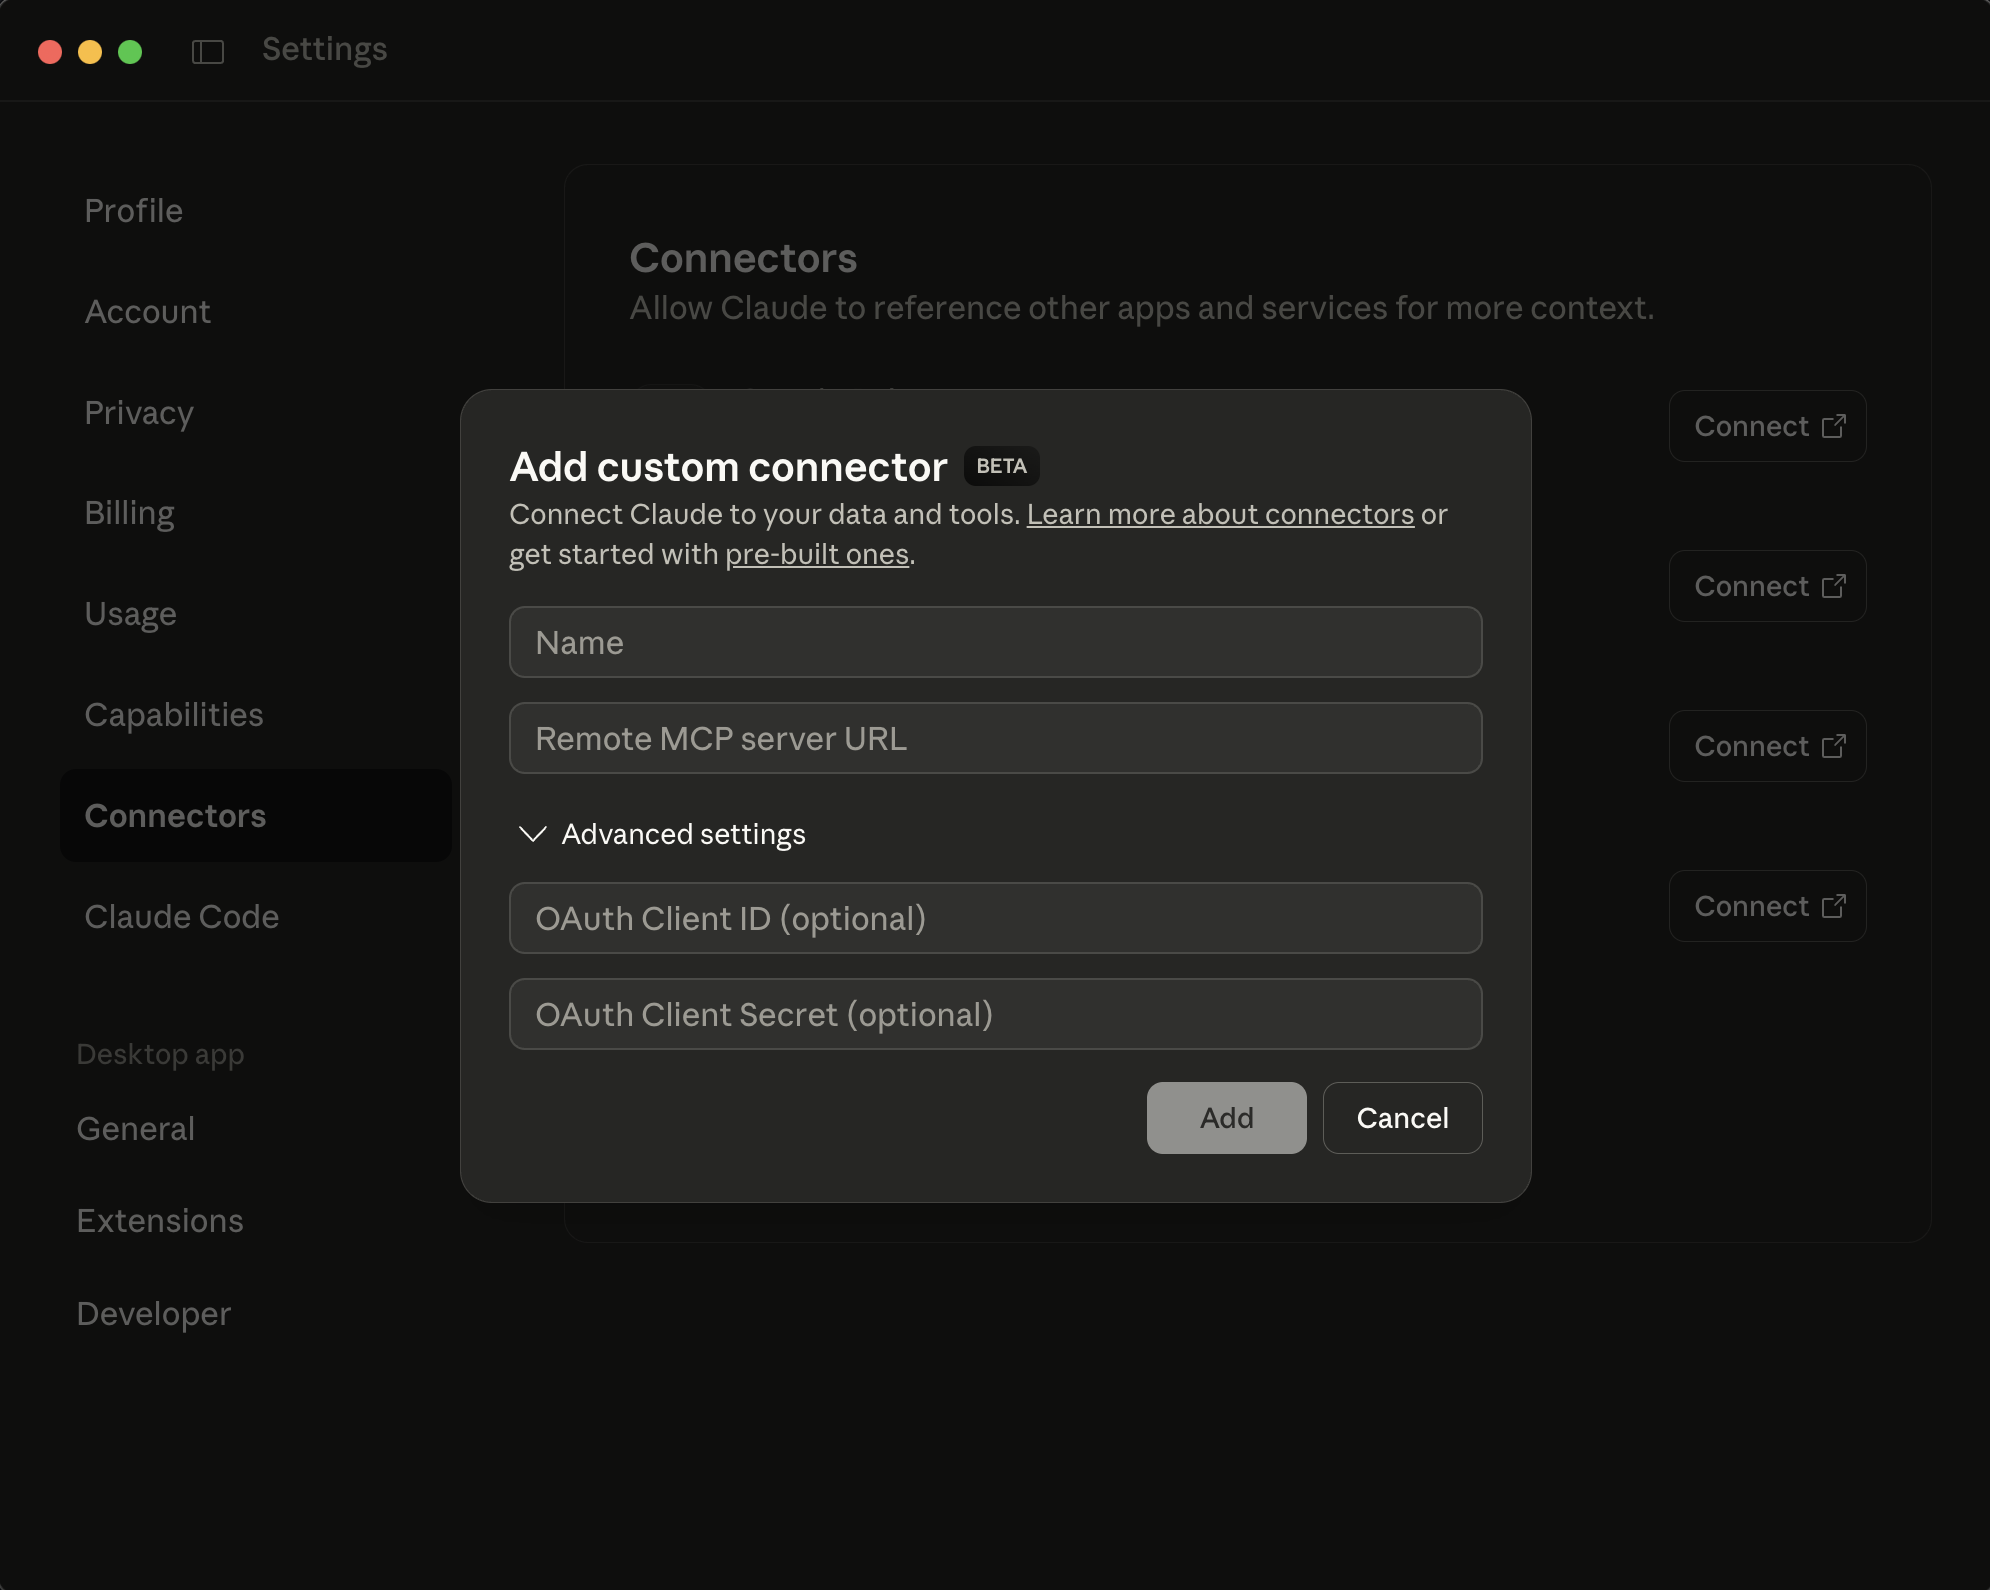
- Click "Add custom connector"
- Fill in the details:
- Name:
TengineAI(or any name you prefer) - Remote MCP server URL:
https://app.tengine.ai/mcp/
- Name:
- Click "Advanced settings"
- Enter your credentials:
- OAuth Client ID: paste your TengineAI Client ID
- OAuth Client Secret: paste your TengineAI Client Secret
- Click "Add"
Claude Desktop will initiate the OAuth flow automatically. Once complete, the connector status turns green.
Step 5: Verify the Connection
- Open a new conversation in Claude Desktop
- Ask: "What tools are available?"
- Claude should list the tools registered and enabled in your TengineAI project
Troubleshooting
No tools appearing after connecting
- Confirm you have tools registered in your project (see Get Started in 5 Minutes)
- Confirm the tools are enabled — check
is_enabledfor each tool in the dashboard - The model only sees tools that belong to the same project as the integration used for the OAuth credentials
Connector shows as disconnected
- Delete the connector and re-add it; this forces a fresh OAuth flow
- Check that
https://app.tengine.ai/mcp/is entered exactly — including the trailing slash
OAuth flow fails immediately
- Ensure the integration is active in your TengineAI dashboard
- Confirm the Client Secret hasn't been rotated since you copied it
Next Steps
- Custom Tools – Register the tools Claude Desktop will have access to
- Authentication — API Keys – Use API keys for programmatic access instead
- Python Quick Start – Connect without Claude Desktop using the Anthropic SDK